Disclosure: My website is reader supported. If you purchase a product after clicking a link, I may receive a commission, at no extra cost to you. Learn more.
In the video above, I share my experience of using the Chilipad 2.0 for the last four months. You’ll find a quick overview below, followed by the full video transcript and photos.
Overview
The Chilipad 2.0 is a powerful bed cooling and heating system, and it’s been very reliable in the four months we’ve used it. The dual-zone setup lets us each choose a comfortable temperature as the seasons change, without having to compromise on whether to open the windows or turn the heating on or off.
The new bedside remote control is one of the biggest improvements compared to the Chilipad 1.0, which we used for over a year. We both prefer using it to opening an app just to make a small temperature adjustment.
For me, the lack of a subscription fee and the option to run the system without Wi-Fi are the main reasons to choose it over alternatives such as Eight Sleep. It doesn’t have any tracking or AI features, so it’s one to consider if you only want heating and cooling.
Pros
- Powerful cooling and heating.
- Dual zones for different temperatures on each side.
- Three ways to control it: app, dock, and bedside remote.
- Temperature controls and schedules work offline.
- Comfortable mattress pad.
- Machine washable cover.
- Modular design lets you get a single zone for a larger bed.
- Individual parts can be replaced.
- No subscription fee for any features.
Cons
- The setup can be fiddly at times.
- Regular maintenance required.
- Need to buy the Sleepme cleaning solution.
- The dual-zone setup needs four plugs for the two docks and two remotes.
- Expensive up front, especially for two zones.
- No sleep or health tracking.
- Some fan noise.
Price
At the time of writing, one zone for one sleeper costs between $1,599 and $1,799, depending on your bed size. Prices for the dual-zone setup range from $2,798 to $3,198.
If you use the promo code NOSLEEPLESSNIGHTS you can get an 8% discount on the official Sleepme website.
Full review / video transcript
I’ve edited the transcript a little to make it read better. I’ve also added a few extra notes I thought would be useful. And to clear up any confusion, Sleepme renamed the Chilipad Dock Pro to the Chilipad 1.0 when they released the Chilipad 2.0.
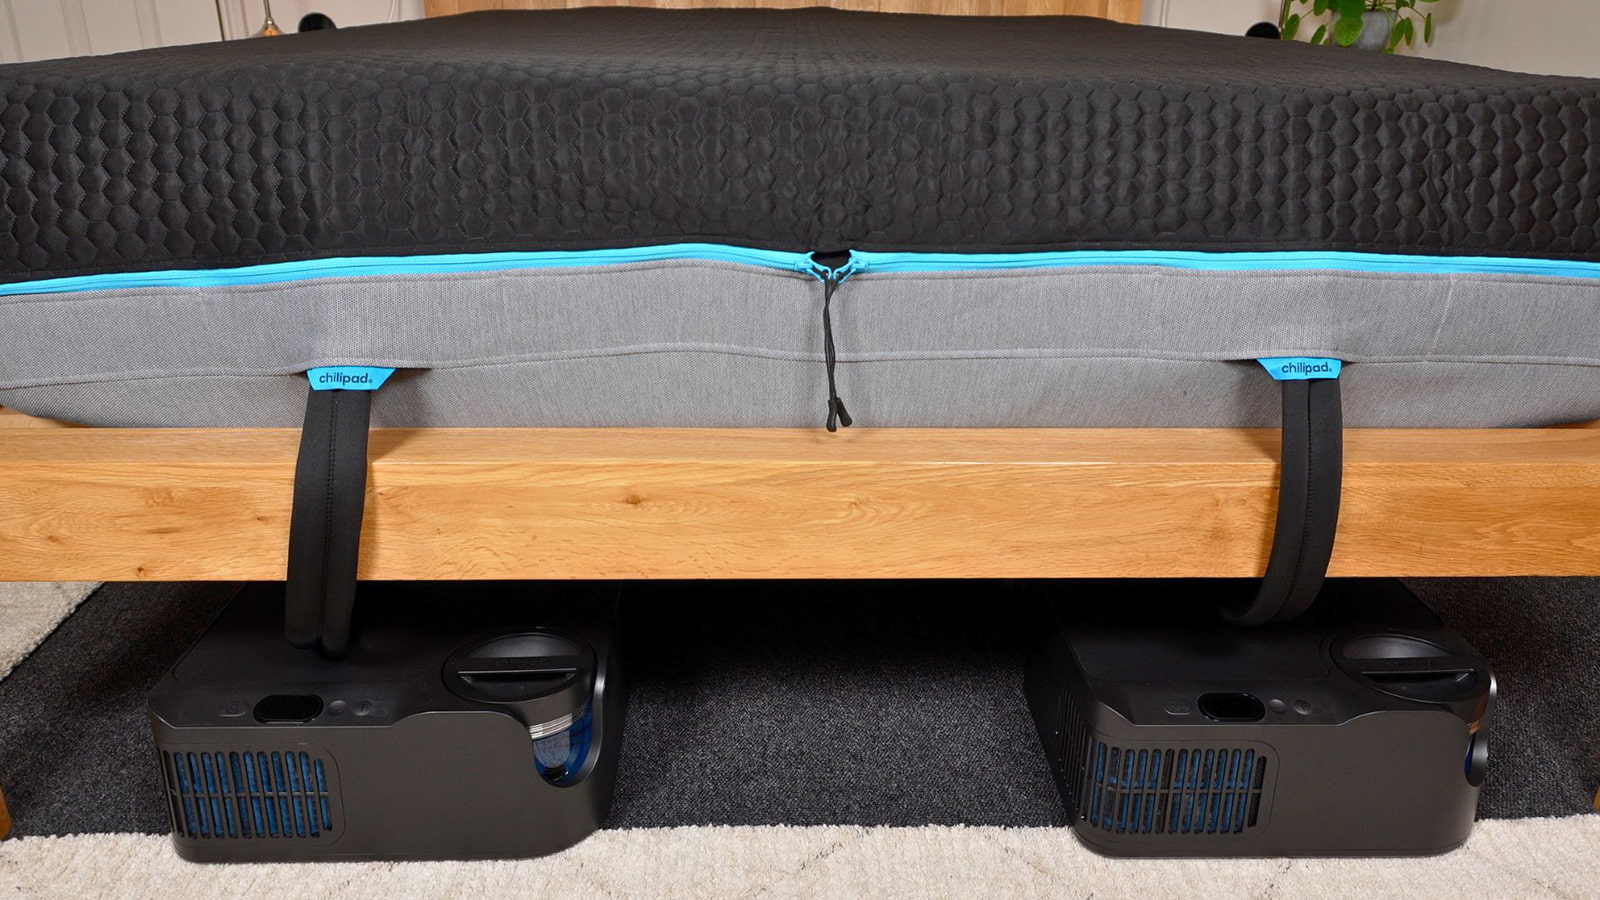
Introduction
We’ve used the Chilipad 2 most nights for the last four months, and so far we’ve been very happy with how well it both heats and cools the bed. The main reason we use a bed cooling and heating system is that it allows us to have different temperatures on each side of the bed.
During this summer’s intense heat waves, for example, I kept my side nice and cool while Irene kept hers fairly neutral. And now we’re in the autumn, she’s been loving getting into a toasty warm bed while I’ve dialed back on the cooling.
It’s also a big upgrade from the Chilipad 1, which we used for over a year (read my Chilipad 1 article). The mattress pad is more comfortable, the fan is quieter, and the excellent nightstand remote means you can change the temperatures without using the app.
But it still requires regular maintenance. It takes longer to set up than the previous model, and you need multiple power outlets or an extension for dual zones. So in this review, I’m going to explain what it’s been like to use, the downsides to keep in mind, and who I think it might be best suited for.
In the photo below, you can see the convenient remote control, which we both use all the time. It’s a feature I haven’t seen in other bed cooling systems. Some have buttons or a TV style remote, but this is the first one I’ve seen with a colour touch screen and easy to use dial for the temperature.
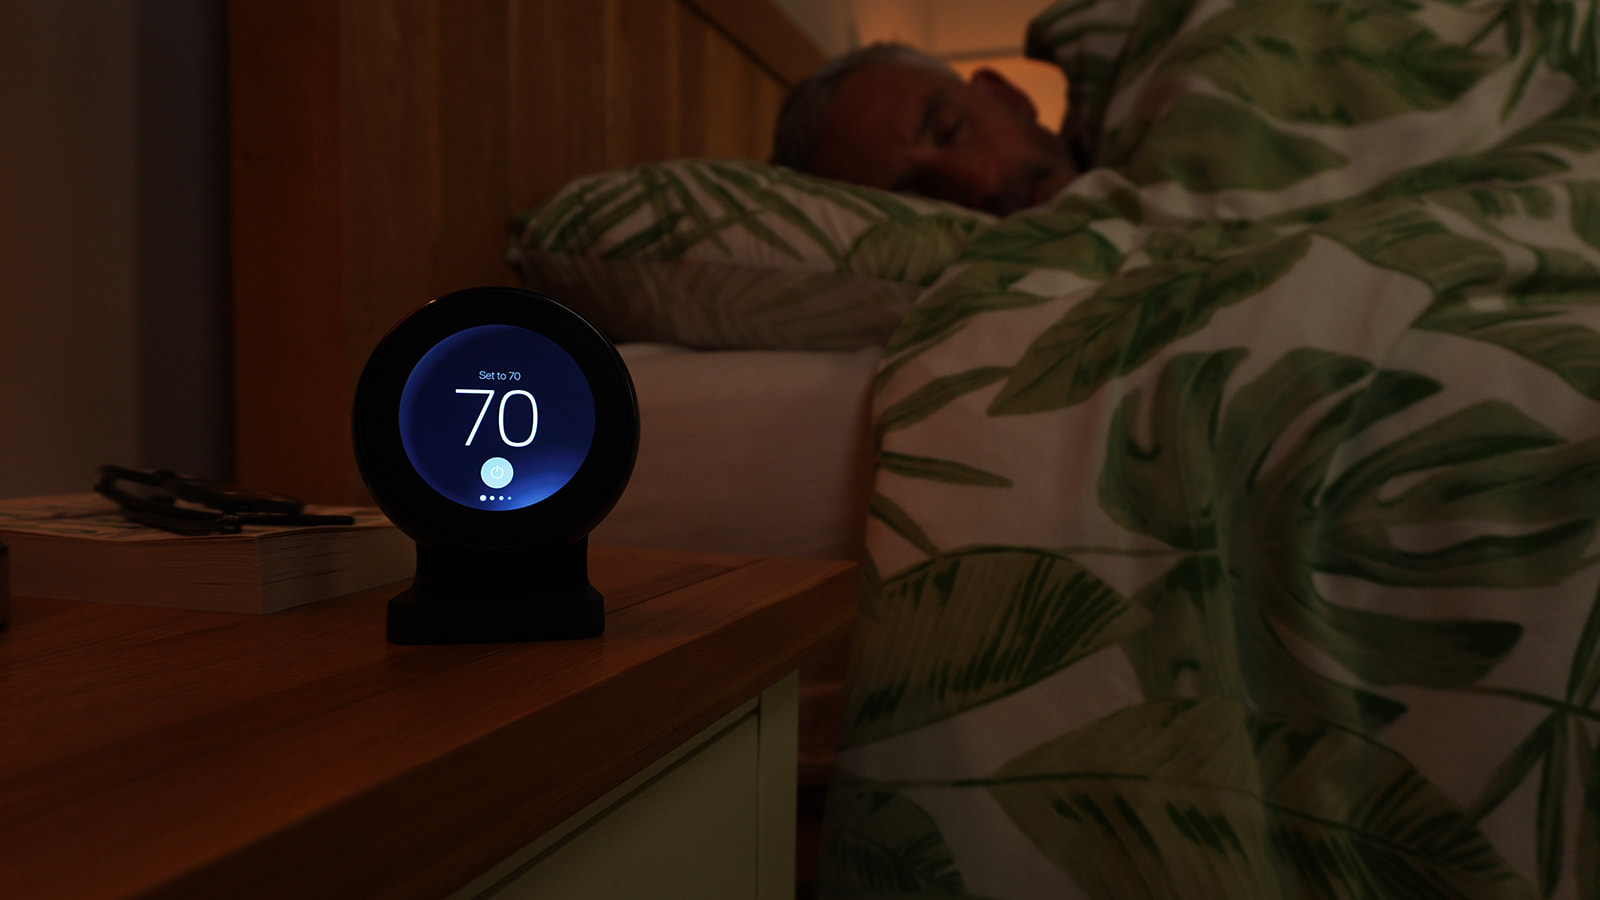
Setup process: what I did
Let’s start by going through the setup process, which is a good way to understand how it works and what’s changed from the previous model.
The first step was to fit the Chilipad cover over my mattress. Unlike the previous version, the cover doesn’t contain the water tubes. Those are in the removable hydrolayers now, which you attach later.
The cover tucked quite far under my mattress and also works as a mattress protector, which is great. It took me around four minutes to get it aligned. It was a bit of a faff at times because I had to get the corner straps under my mattress while making sure my mattress topper stayed in place. But once it was in place, it looked very smart. The stitching and material seemed robust, and the top surface had a soft feel.
The next step was to add the first hydrolayer by unzipping the top part of the cover and attaching it to the part encasing the mattress. Now, I can understand the benefits of the new removable hydrolayer design. It’s easier to drain, easier to wash the cover, and it makes the system modular for one or two sleepers. But it was a bit fiddly attaching it to the cover.
There are ladder fasteners on all four corners, so you kind of need to guess which level to attach to. And attaching the S-clips to the ladders can be a bit slow, so it took me around five minutes to attach the first hydrolayer.
Below, you can see how the hydrolayer goes inside the Chilipad cover – on top of the bottom section and under the top section that later zips onto the bottom.
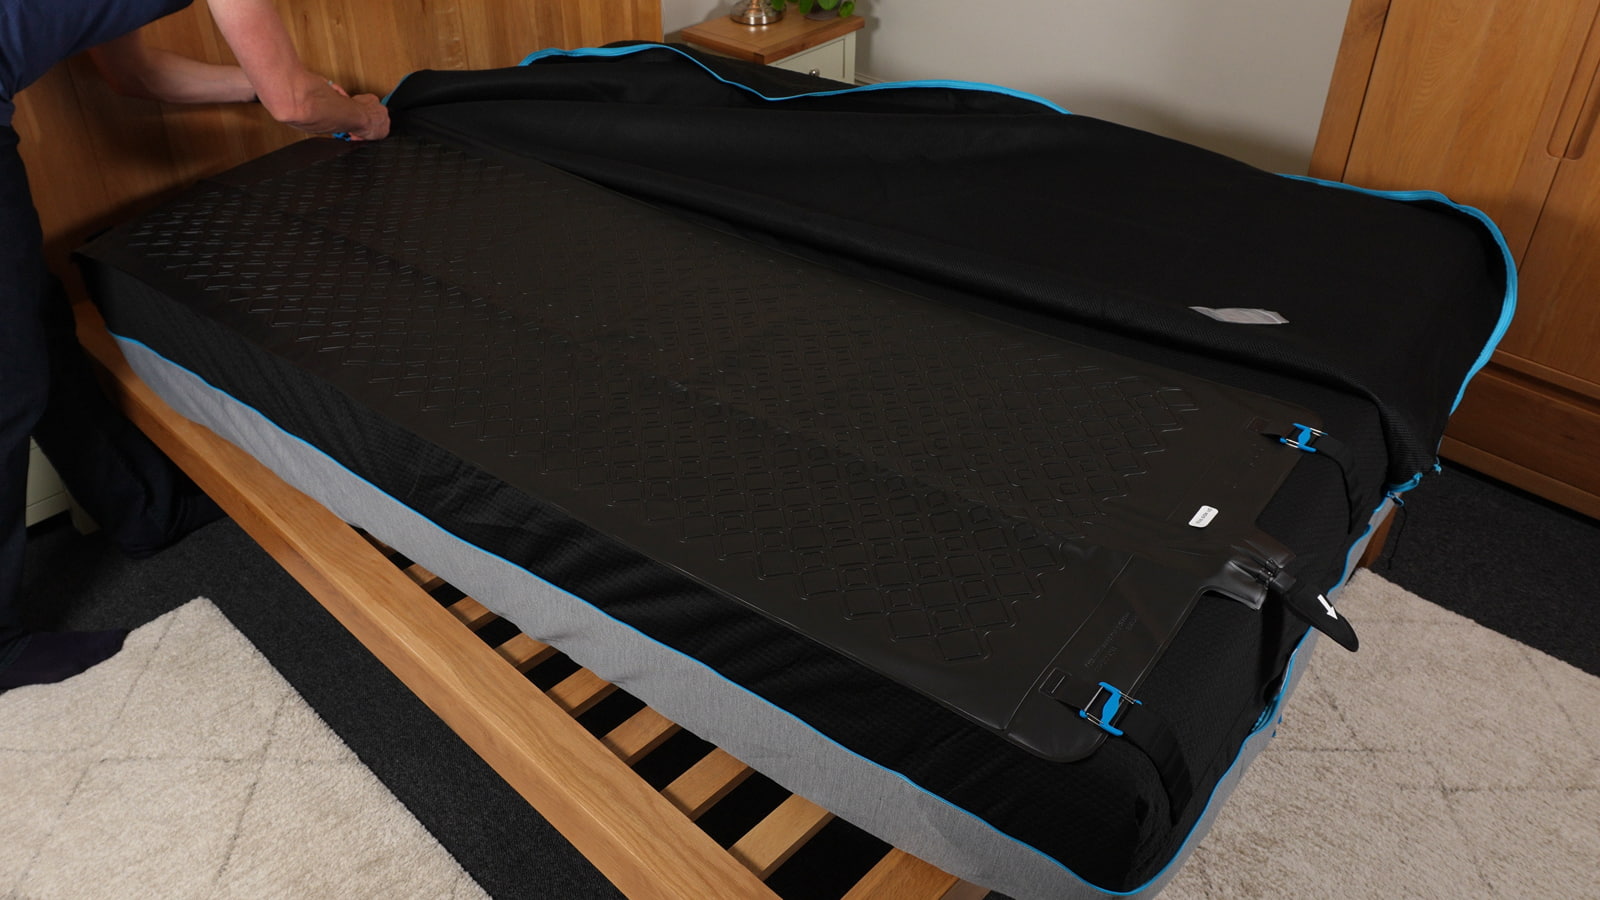
I then attached the water hose to the hydrolayer, which has a firm locking mechanism and a smart-looking fabric cover. At this point, you could attach the other hydrolayer if you have dual zones, but I decided to complete one side first.
So I unboxed the dock, which is the unit that heats or cools the water, and plugged in the power cable. I then clipped in the other end of the water hose, which also has a secure locking mechanism.
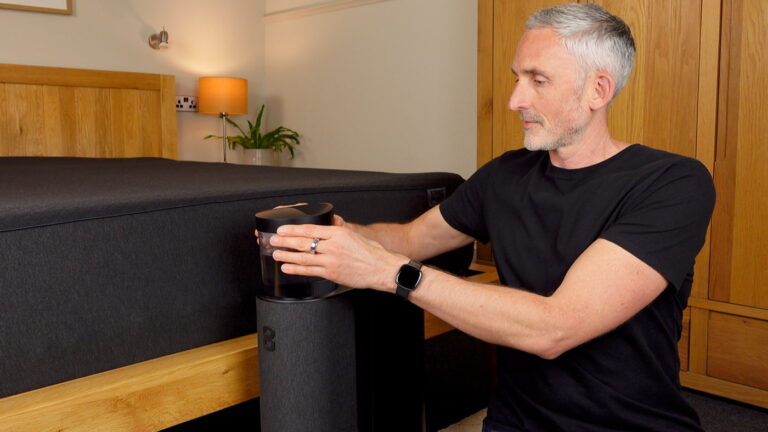
Next, I added a pack of the Chilipad system cleaner. I was happy to see that the lid of the water reservoir is much smoother to remove than the one on the previous model, which needed both hands. I then added distilled water until the screen on the dock said it was full. It took around 3 litres, so I would have preferred it if I could use filtered water rather than having to buy distilled water.
Finally, I connected it to the Sleepme app. Once I’d signed in and paired the app with the dock via Bluetooth, I connected the dock to my Wi-Fi. It took a few minutes to connect, but once it did, I could start creating my schedules or change the temperature.
The last step for this side was to plug in the bedside remote control and pair it with the dock. The remote is a very useful new feature, but it does need a separate power outlet.
Below, I’m attaching one of the s-clips to the ladder on the pad. Maybe it’s my big fingers, but I found it quite fiddly. I suppose they need to be tight so the pad stays neat, but they do need a bit of wiggling to get in place!
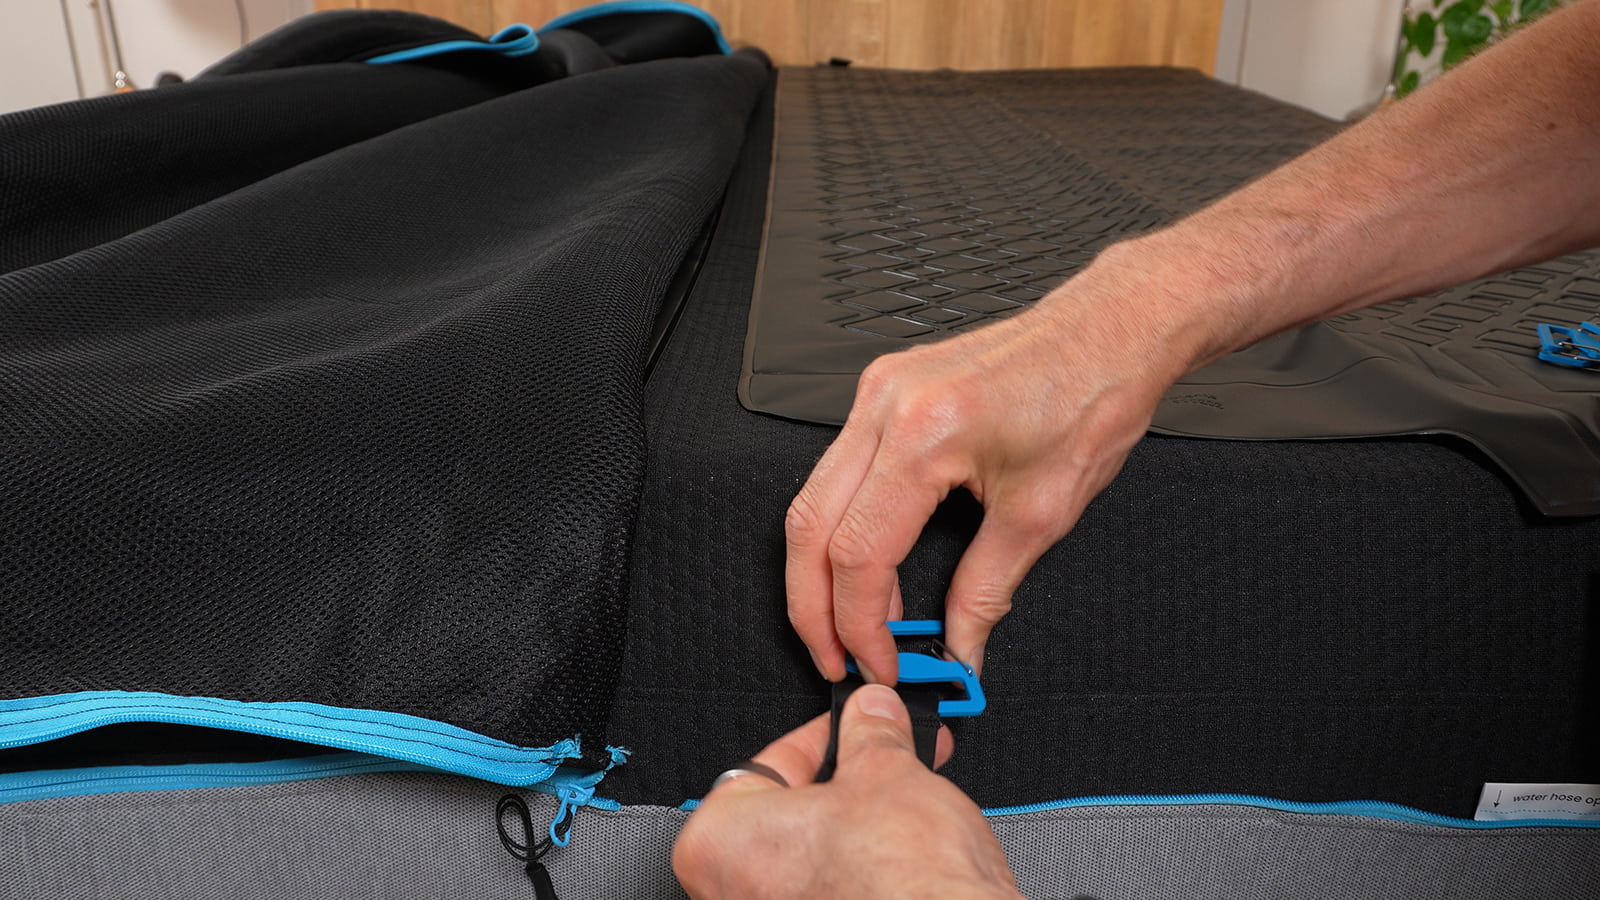
I then installed the second hydrolayer, dock, and bedside remote for the other side of the bed. This was much faster as I’d already been through the process once. As you can see then, there are quite a lot of steps involved with setting up the Chilipad 2. But once it was all up and running, I was very impressed by how smart the system looked.
Other than the occasionally fiddly setup process, every part seemed to be an upgrade from the Chilipad 1, and it had a much more premium look and feel.
Installing the docks at the head or foot of the bed
One important point to understand about the installation is that you need to find space for the dock unit, or two of them if you have dual zones. Fortunately for us, we can get them under the bed frame and they just slide out of the way.
But if you have a solid bed base, you can turn the whole system round and have the docks by the head of the bed so you don’t trip over them in the night.
Note: My preference is always to place the base units of bed cooling devices at the foot of the bed. When they cool, they release warm air into the room. It’s the same with the Eight Sleep Pods, for example. In the past, I’ve found that you can sometimes feel the warm air they release on hot summer nights when the room temperature is already quite warm. So if you can, I’d recommend installing them under the foot of the bed.
Heating, cooling, and temperature range
Okay, let’s talk about the heating and the cooling. The dock units circulate temperature-controlled water through the hydrolayers in the pad to keep you warm or cool throughout the whole night. And in our experience, it does both of those jobs really well.
It has a very wide temperature range. You set it from a chilly 55 degrees Fahrenheit all the way up to a very warm 115 Fahrenheit. That’s approximately 13 to 46 degrees Celsius.
Chilipad 2 temperature range
- 55–115°F
- 13–46°C
Personally, I never set it on the coldest temperatures, though. Maybe some people would like it, but I don’t need that level of cooling to sleep comfortably. And even though Irene is a cold sleeper, she doesn’t use it on the hottest temperatures either, so it more than covers both of our preferences.
Having said that, she does quite like to have a nap on the weekend with it on very warm temperatures. She says it’s like having a dry bath and just really enjoys it!
Tests with my thermal imaging camera
This section starts at 4:36 in the video and is better to watch than read!
To give you a better idea of the full temperature range, let’s have a look at some thermal imaging I did.
To start with, this is the pad 3 hours after I switched it off. Here you can see the pad on our current moderate settings. My side is warmer than the surrounding room, but a lot cooler than my body temperature.
This is my side on maximum cooling and Irene’s on maximum heating. The surrounding colours changed from the previous clip because my thermal camera adjusts the colours according to the temperatures in the image, but you can still see a big difference between the cold blue and the hot yellow.
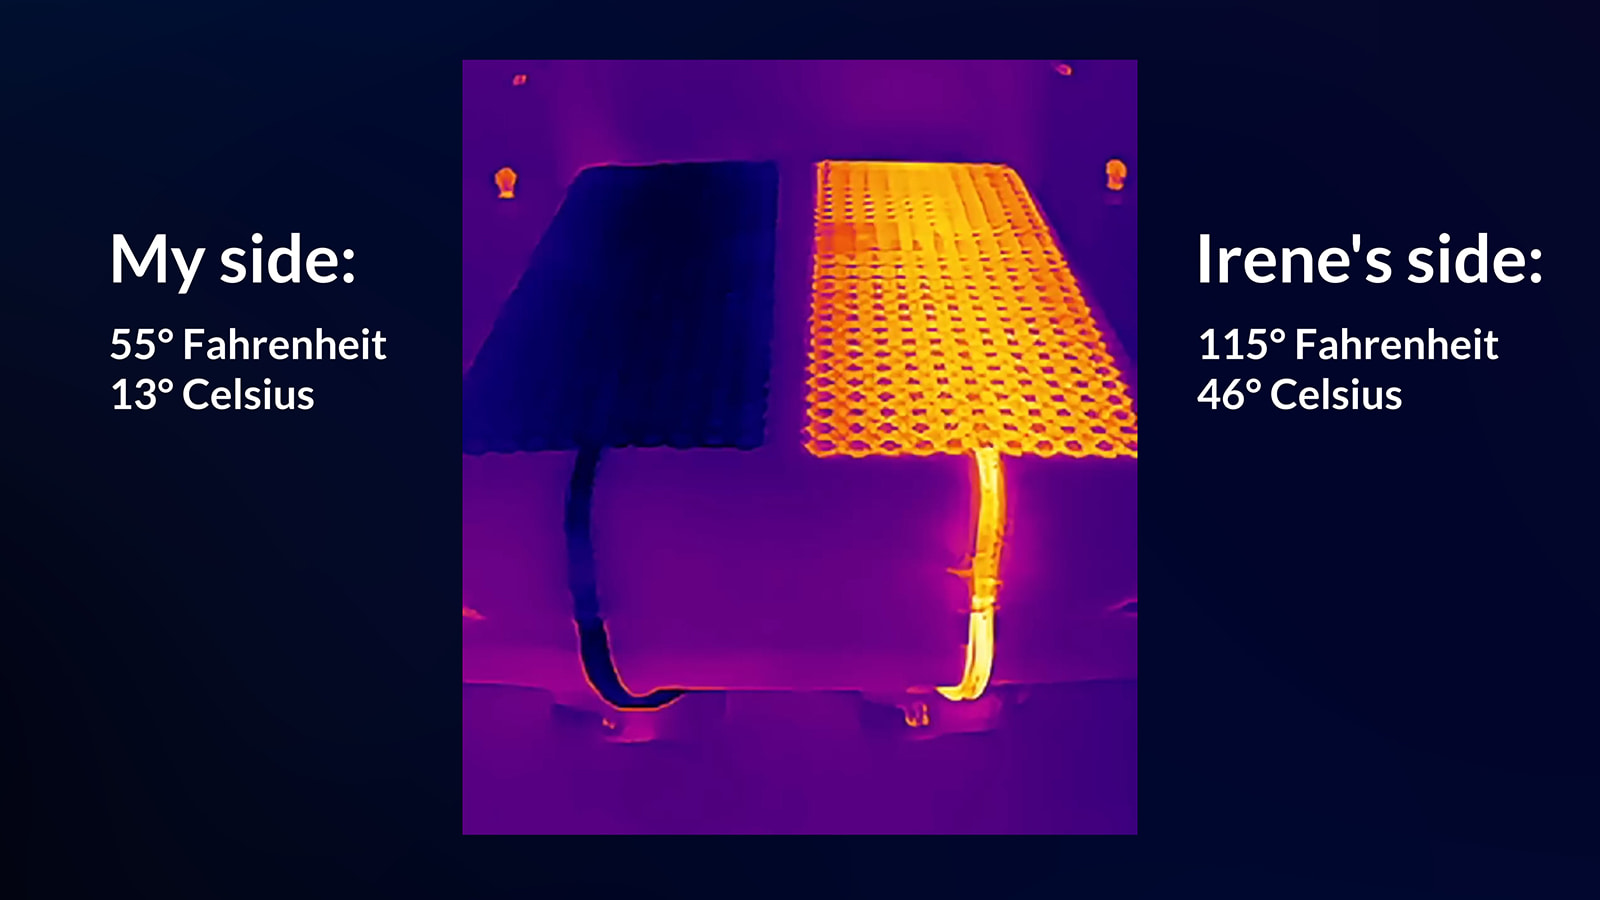
And here are the temperatures reversed now. You can see that there’s a fairly even temperature spread and we haven’t noticed any patchiness when we’re in bed.
In the next three clips, there’s an empty bed on the left with the Chilipad off. In the middle, I spent an hour in bed with the Chilipad still off. And on the right, I spent an hour in bed with it on maximum cooling.
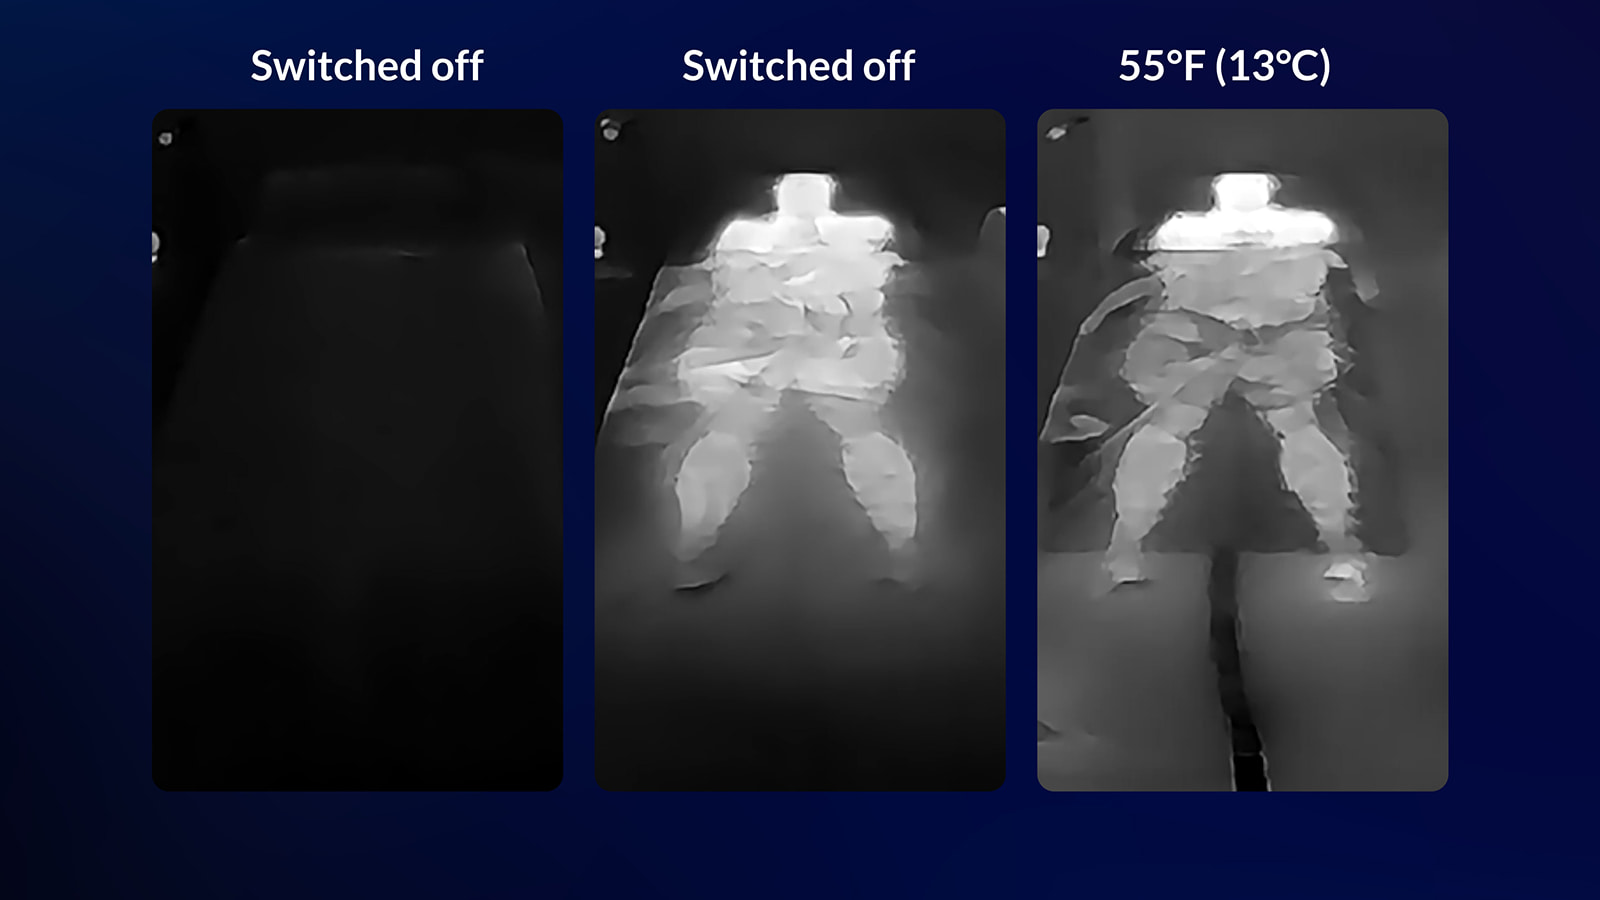
Again, the tones change because of the temperature range the camera picks up, so it’s not a perfect comparison. But it’s still interesting to see the warmth left behind by my body and how the cooled pad remains visible around it compared to when the Chilipad was off.
Testing how quickly it can change temperature
| Test | My side (°F) | Irene’s side (°F) | Time taken |
|---|---|---|---|
| 1. Small adjustments | 77 → 73 | 75 → 82 | 7 minutes |
| 2. Maximum cooling and heating | 73 → 55 | 82 → 115 | 31 minutes (Heating was quicker) |
| 3. Swap extremes | 55 → 115 | 115 → 55 | 34 minutes to heat 38 minutes to cool |
Another good point is how quickly it can change temperature. It’s something I’ve noticed in the night if I’ve woken up feeling a bit too hot or cold and I’ve used the remote control to change it by a couple of degrees. That never seems to take more than a few minutes. But I also did some time tests with nobody in bed.
In test one, I dropped my side from 77 to 73 degrees and increased Irene’s side from 75 to 82, and that took 7 minutes.
In test two, I decreased mine even further to the max cooling and increased hers to the max heating. That took 31 minutes, though the heating was a bit faster.
In test three, I then set each side to switch to the opposite end of the scale. The max cooling to max heating took 34 minutes, and the max heating to max cooling took 38 minutes.
Since we never use the more extreme temperatures anyway, it means we can quickly get it to the temperature we want if we go to bed earlier one night or come home from a trip.
How comfortable is the pad to lie on?
As for the comfort, we both find the mattress pad very comfortable to lie on. The removable top cover feels much softer and plusher than the Chilipad 1. I think the wide water channels of the hydrolayer stop it from feeling bumpy.
My one criticism is that even though you don’t feel the plasticky hydrolayer because it’s under the fabric cover, you can hear it a bit when you change position. But if you use the ladder fasteners correctly to keep it neat, it doesn’t bunch up and it makes less noise.
Note: I don’t mention it in the video, but if you end up with the hydrolayer being too loose because you didn’t choose the right ladder for the S-clips, it can bunch up and you’ll feel big ridges. If that happens, just unzip the top cover and adjust the ladder fasteners.
In the photo below, you can see how the width of the water channels in the hydrolayer compares to my fingers, which are large.

Three ways to control the Chilipad 2
A unique benefit of the Chilipad 2 compared to previous systems I’ve used is that there are three ways to control it. You’ve got the remote control, the app, and the dock. We mostly use the remote control and the app, but it’s good to have the dock as a backup.
1. The app
Because there’s no sleep or health tracking, the app is streamlined and easy to use. We sometimes use it to turn the Chilipad on if we’re out of the bedroom and to use the main dial to adjust the temperature. But the main reason to use the app is for the schedules.
You can have a different schedule for each day of the week or groups of days like I do. You choose a start temperature for bedtime. Then the app suggests lowering it for the deep zone and raising it for the REM zone. And there’s an optional thermal alarm that warms the bed before you wake up.
In the two photos below, you can see the Sleepme app screens for the temperature and schedules. We’ve found it’s always at the temperature we set it to by the time we go to bed.
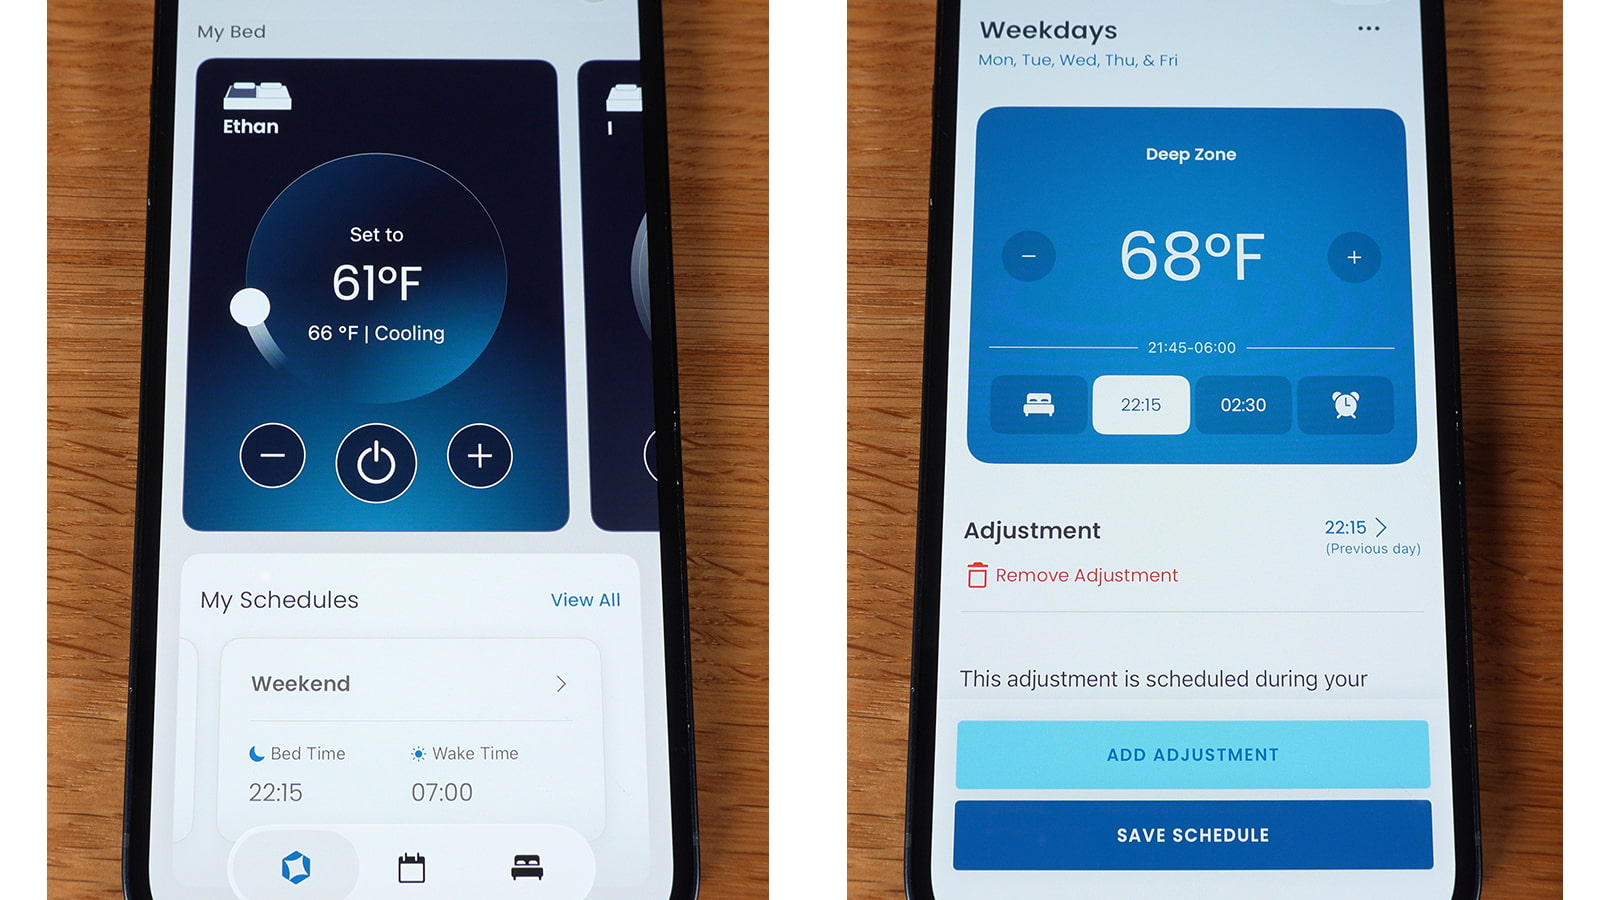
I like the flexibility to add extra adjustments if you want them, but the initial ones seem to have worked well.
In my experience, when you first get a new system like this, it can take a few days to work out which temperatures are going to work best for you. So I was thinking it would be good if Sleepme added a range of different temperatures to try based on some different demographics.
Note: the thermal alarm is really hot and neither of us is currently using it. Irene did have it on for a month, but found it sometimes made her fall back to sleep as she loves the warmth! I just prefer not to wake up feeling like I fell asleep in a sauna, so I leave it off.
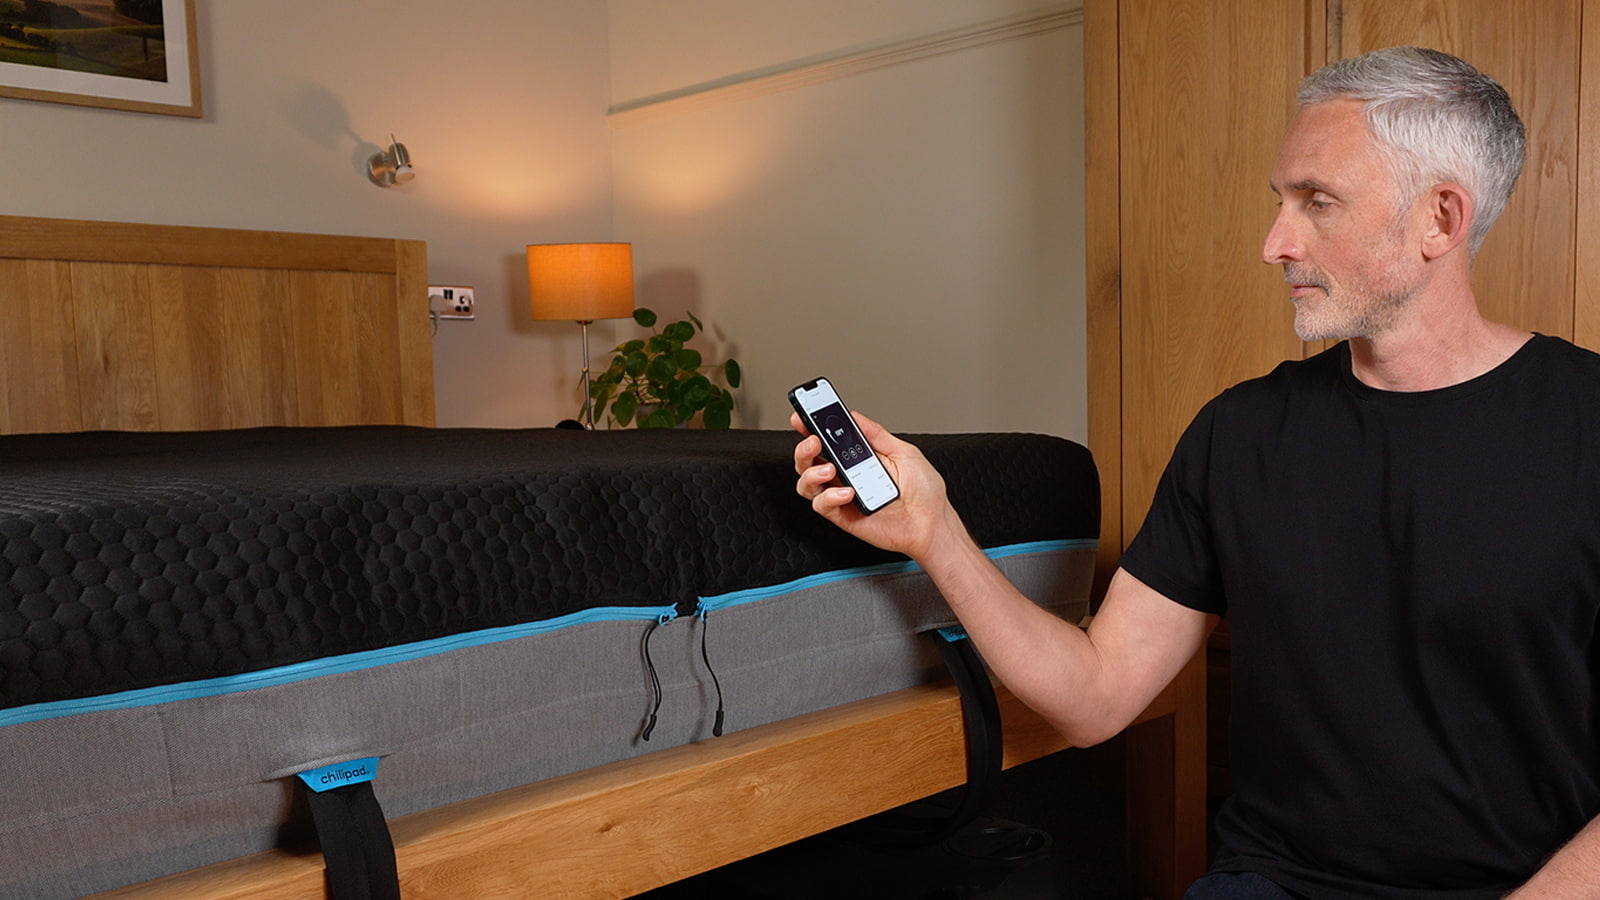
In the photo below, there are a few things to note. First, the water tubes are thinner than the Chilipad 1.0, so you could thread them between some mattresses and bed frames. Second, you can see the zip for the top cover. If you want, you can just remove that to machine wash it, which is easy enough to do. Third, you can turn the dock and app on and watch them both change when you adjust the temperature on one, as the connectivity is very good.
2. The remote control
After setting our main schedules, the control we normally use during the night is the bedside remote. This is an excellent new feature for a couple of reasons.
Firstly, I love being able to easily adjust the temperature in the night without needing to use my phone. And secondly, it’s great having the temperature displayed on the screen so you can see exactly what it’s set to.
Below, you can see the remote on its hottest setting. It’s very easy to turn the dial, though you do have to turn it a lot to go from the lowest to highest temperature! You can also set it in Celsius rather than Fahrenheit if you prefer.
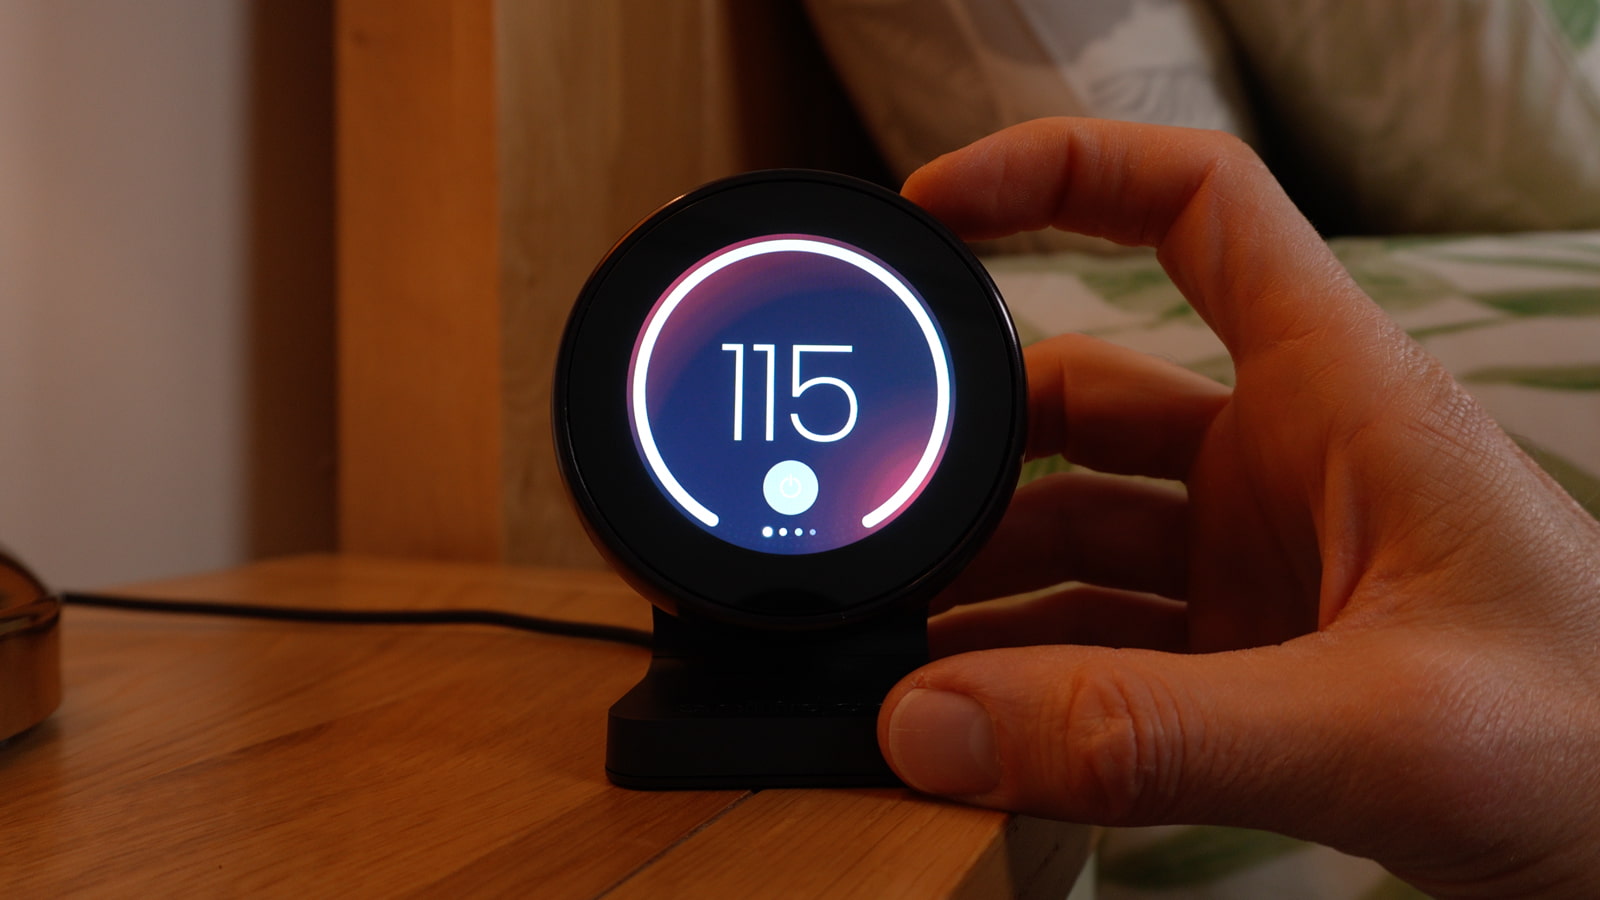
The remote also gives you access to several other settings. I like being able to adjust the screen brightness and the timeout for the display. Those are both very user-friendly touches.
You can enable presence detector to turn the system on automatically if you go to bed earlier, and energy saver if you get up early or are away from home. There’s also a clock and a temperature and humidity monitor, which I don’t really use.
Below, you can see some of the settings on the remote’s touch screen. I prefer the brightness at 100% and the screen timeout at 10 seconds.
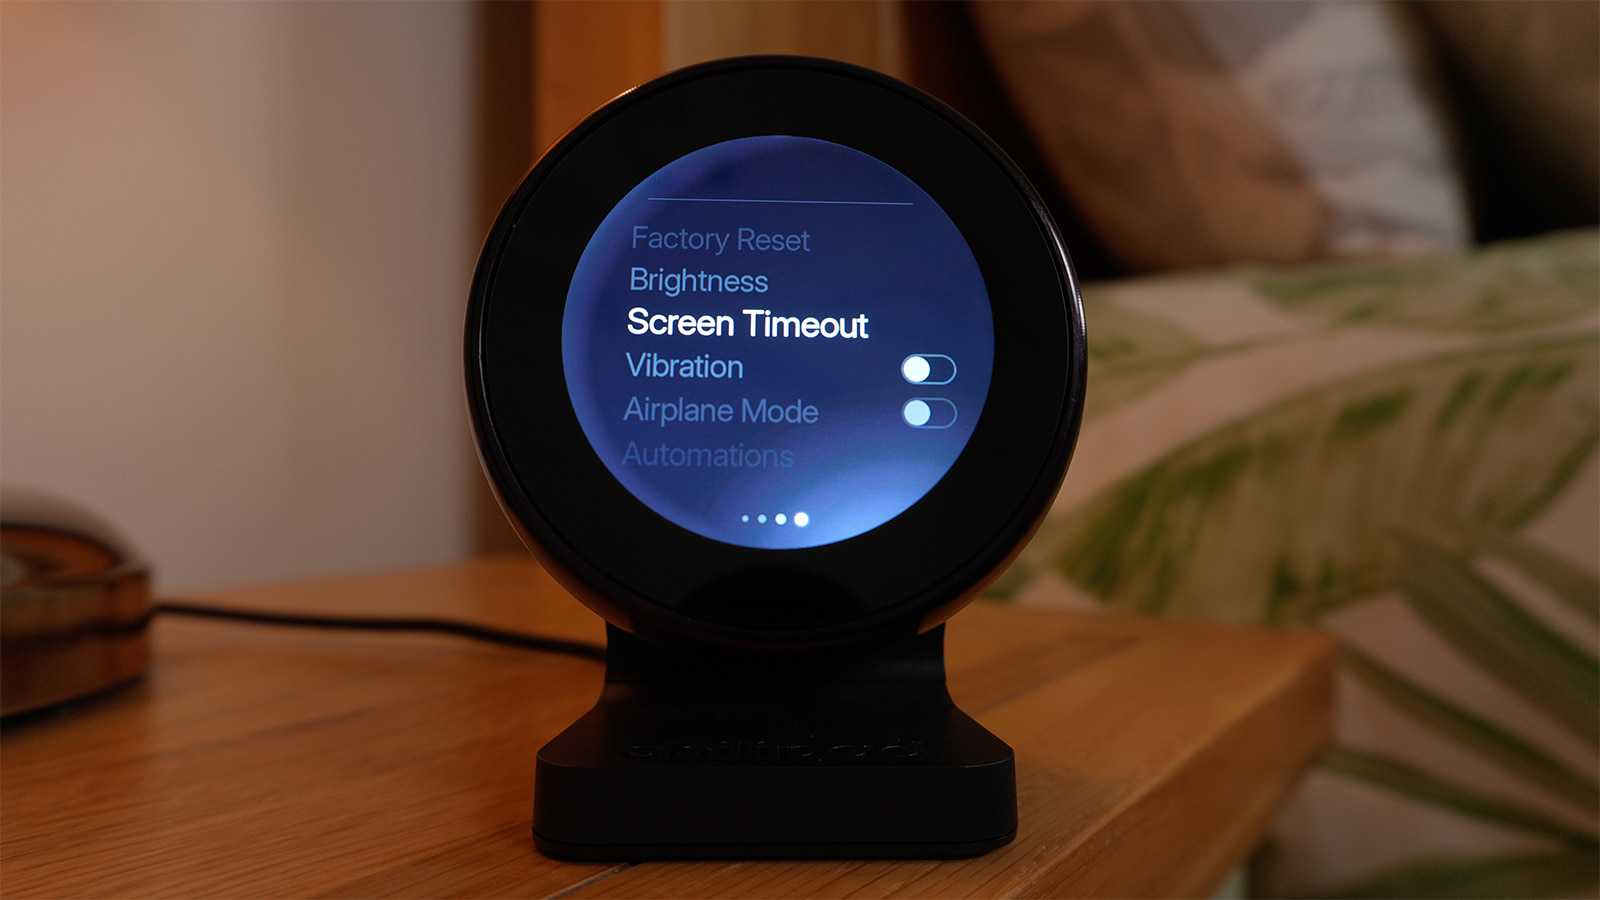
My main criticism of the remote control is that it needs its own power outlet. When I first installed it, I was a bit surprised that they’d designed a dual-zone system that requires four power outlets.
The power leads are all quite long though, so you could use an extension block under the bed if necessary. And the remote does at least have a USB-C port so you can charge other devices. The separate plug is a bit inconvenient, but I’m willing to tolerate it because the remote is so useful.
Note: The remote has a touch screen and a full 360-degree physical dial to adjust the temperature. So it’s really easy to change the temperature in the night as the dial is quite large.
Settings on the remote:
- Turn dock on or off
- Adjust temperature
- Time
- Room temperature and humidity
- Remote status
- About
- Pairing mode
- Prime hydrolayer
- Factory reset
- Brightness (0-100%)
- Screen timeout (5 -60 seconds, or never)
- Vibration (when turning the dial)
- Airplane mode
- Automations (proximity / energy saver)
- Presence
- Wi-Fi network
- Temp unit F / C
- 24 / 12 hour time
3. The dock controls
As for the dock controls, I like that the screen is much more visible than the Chilipad 1. I rarely use the dock controls, but you could use it to turn on the airplane mode if you don’t want to use the app or remote, for example. It’s also a quick way to turn both docks on or off at the same time.
Below, you can see that the current temperature matches my selected set temperature on the dock. The symbol on the left shows it’s in airplane mode.
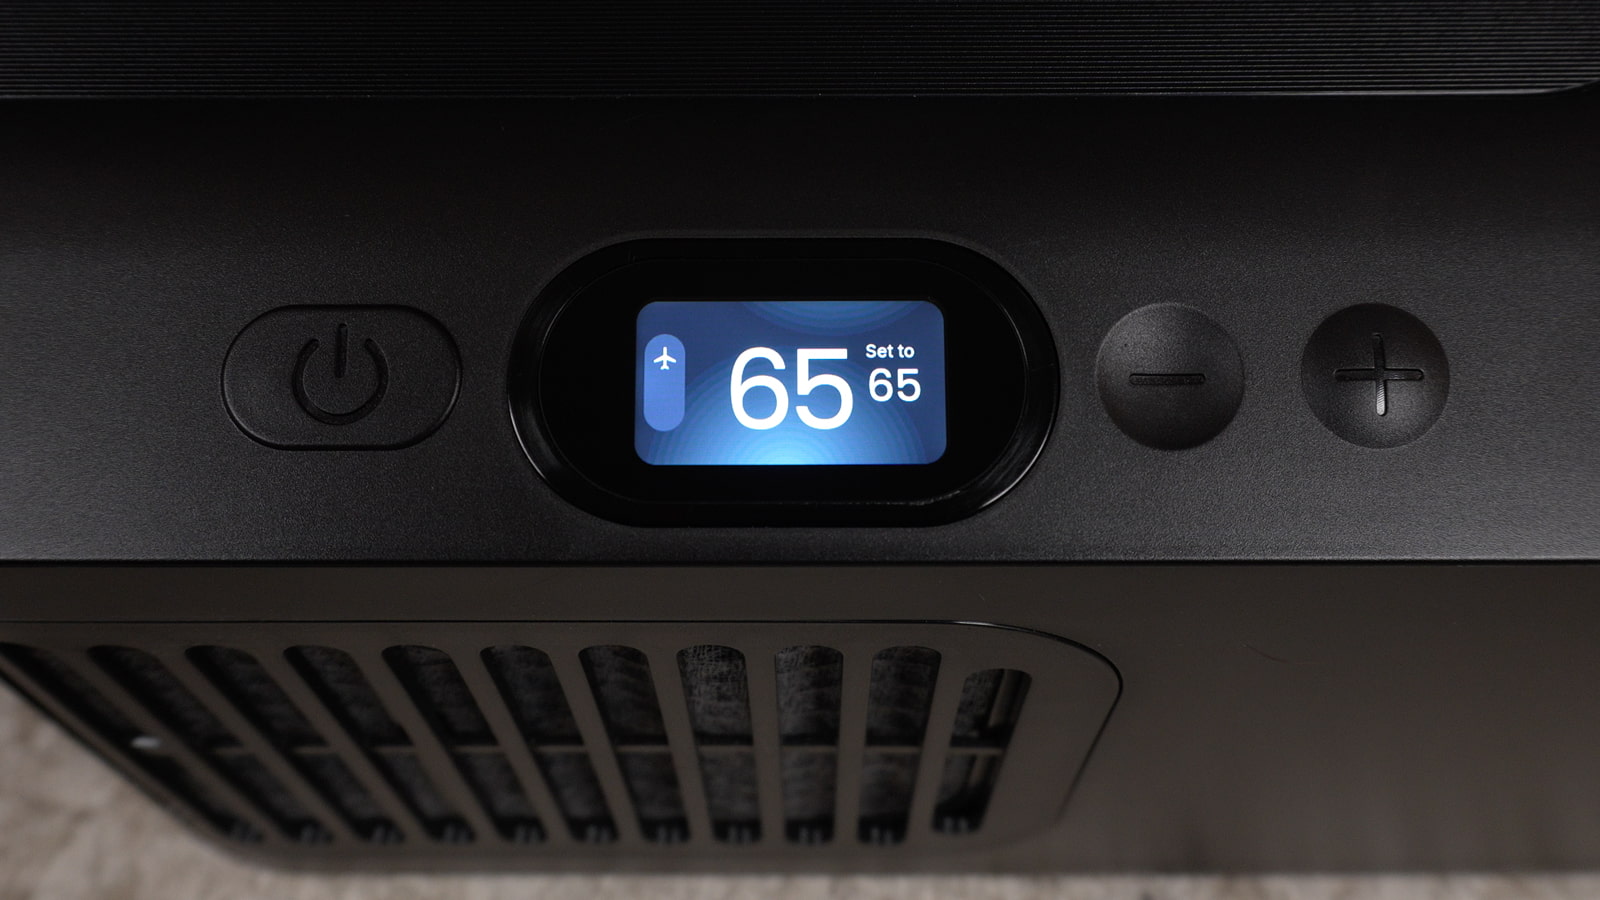
Settings on the dock:
- Power on / off
- Temperature up / down
- Wi-Fi network
- Airplane mode
- Brightness (Dock screen)
- Flip display
- Temp unit F / C
- Pair remote
- Prime hydrolayer
- Drain reservoir
- Firmware version
- Factory reset
Note: there are just three buttons for the power and temperature controls. To access the rest of the menu, you long press the + and – temperature buttons.
Measuring the fan noise
Another big improvement is the quieter fan in the dock unit. All bed cooling systems make some noise, but the fan is very soft on our usual settings. It does make more noise if you have it on the coldest settings as the fan speeds up to release more heat into the room.
I never hear it though because I wear earplugs or headphones, but Irene doesn’t use earplugs and she would sometimes complain that the Chilipad 1 was a bit noisy if we had both of them working. But this one doesn’t disturb her at all, which is great.
To measure the noise, I took several readings from 3 feet away with my decibel meter. The quietest was just one dock on a moderate 78 Fahrenheit, which averaged 34 decibels. And the loudest was both docks on the max cooling, which averaged 39.7 decibels. So it’s still not as quiet as the Eight Sleep Pods I’ve used, but it’s not far off it and very tolerable.
Fan noise tests (average of 3 readings)
- One dock · 78°F · 34 dBA
- One dock · 55°F · 38.4 dBA
- Both docks · 75°F / 82°F · 35 dBA
- Both docks · 115°F / 115°F · 34.5 dBA
- Both docks · 55°F / 55°F · 39.7 dBA
The maintenance needed
A key point to keep in mind is that the Chilipad 2 needs regular maintenance, and quite a bit more than previous systems I’ve used, such as the Eight Sleep Pods. On the positive side, the new water reservoirs don’t need to be refilled so often. I’ve only had to top them up once every few weeks.
In the photo below, I’m filling the water reservoirs. I don’t need to do this nearly as often as I had to with the Chilipad 1.0.
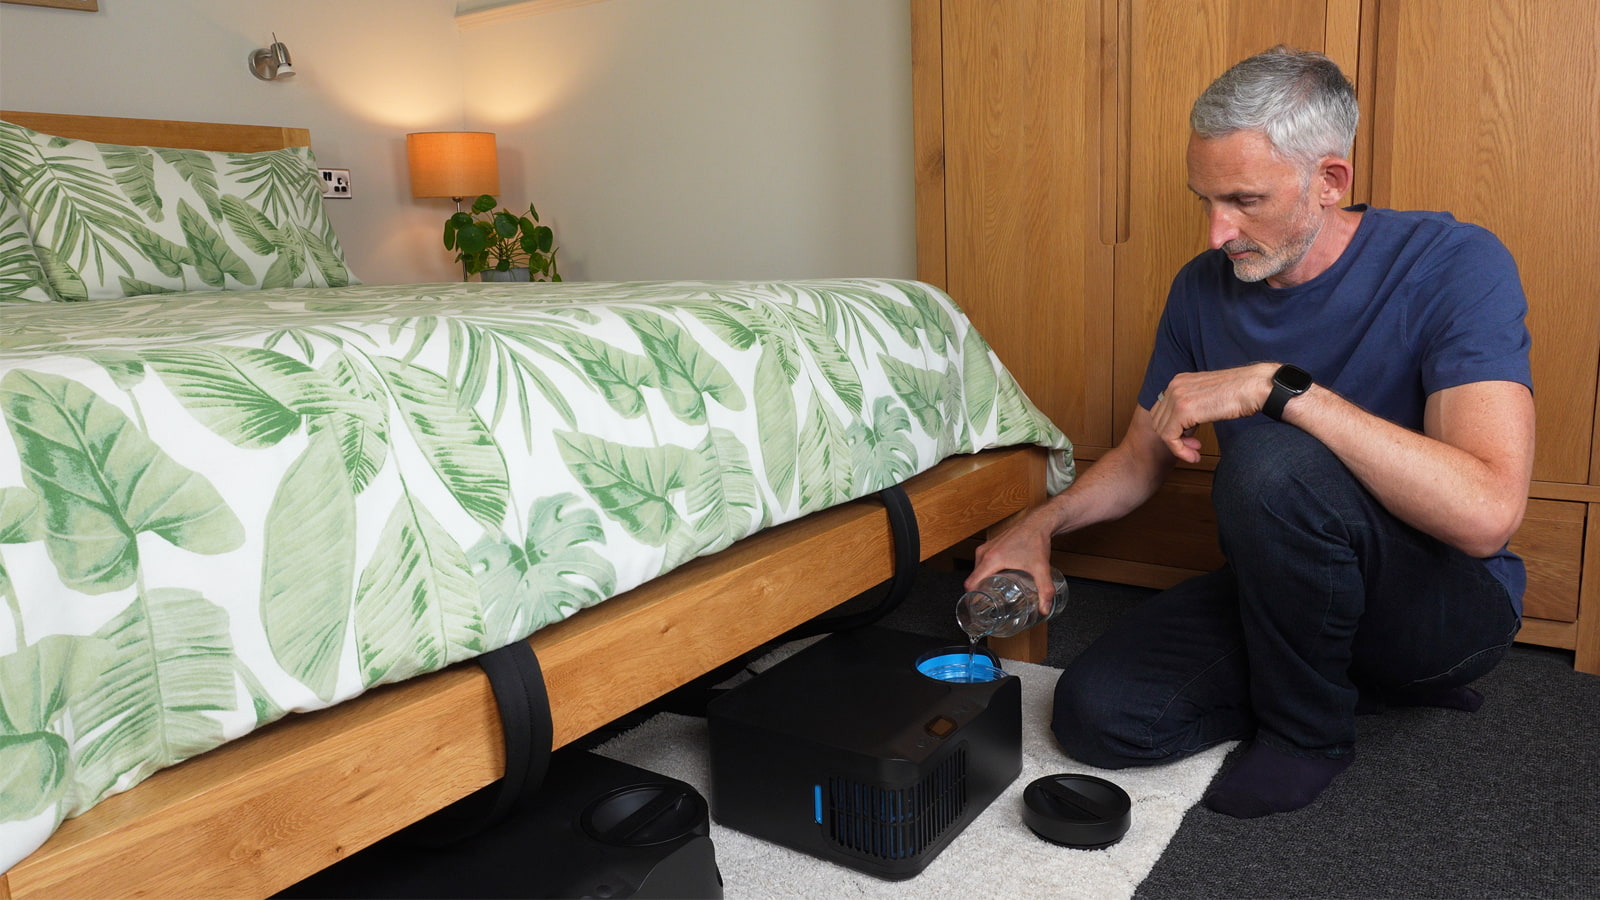
But once a month, you’re also supposed to add a new pack of system cleaner and top it up with distilled water. And every six months, or as needed, there’s more involved maintenance. You’re supposed to remove and clean the air grille on the dock as well as remove, empty, and clean the water reservoir.
You’re also meant to wash the cover and wipe down the hydrolayers. The silver lining, however, is that the cover is machine washable, whereas the Eight Sleep cover I had was spot clean only.
Power consumption tests
| Test | Duration | UK cost at 26p/kWh | US cost at 18¢/kWh |
|---|---|---|---|
| Our usual moderate settings | 7 nights | £1.63 | About $1.13 |
| Maximum heating on both sides | 8 hours | 54p | 37¢ |
| Maximum cooling on both sides | 8 hours | 88p | 61¢ |
As for power consumption, I first ran it through a power meter for seven nights on moderate settings.
On our tariff of 26 pence per kilowatt hour, it cost £1.63, which would be £85 per year with the same settings and conditions. On an example US tariff of 18 cents, it would cost roughly $1.13, or $59 a year.
On the same tariffs, both sides with maximum heating for eight hours cost 54 pence or 37 cents. And both sides with maximum cooling for eight hours cost 88 pence or 61 cents.
Personally, I’m happy with the cost on our typical settings, but your settings, room temperature, tariff, and usage will all affect the cost.
Reliability: no major issues so far
As for how reliable the Chilipad 2 is, all I can say is that we’ve had no major issues these last few months. There have been no leaks, the connectivity has been good between the dock, the remote, and the app, and there have been no problems at all with the heating, the cooling, and the schedules.
The only oddity is that the remote’s humidity reading never matches my other devices, but the features I care about have been very reliable.
Sleepme’s right to repair ethos and warranty
I like Sleepme’s right-to-repair ethos. They have a two-year limited warranty, but outside of that you can buy a separate new dock, cover, hydrolayer, or remote. And if you’re comfortable working with electronics, they say they’ll have repair kits and guides like they do for the older models.
Price range
It’s no secret that bed cooling systems can be expensive, but one benefit of the Chilipad 2’s modular design is that you can get a single zone for one sleeper even for larger mattress sizes like a queen or king. That brings the cost down significantly and you can always add the second zone later.
The prices may change by the time you watch this, but at the time of recording, one zone costs between $1,599 and $1,799 depending on your bed size.
If you want dual zones for two sleepers, they range from $2,798 to $3,198. I’m talking in US dollars here because despite my British accent, it’s not currently available in the UK.
Sizes available
One sleeper / single zone:
- Half Full
- Half Queen
- Half King
- Half Cal King
- Half Split King
- Twin XL
Two sleepers / dual zones:
- Full
- Queen
- King
- Cal King
- Split King
No subscription, but other ongoing costs
Another point I really like is that there’s no subscription fee just to access any of the current features. The heating, cooling, and the schedules will all still work even without Wi-Fi or if you put it in airplane mode.
However, as well as paying for the electricity and distilled water, you do need to budget for the monthly system cleaner. For dual zones, that’s around $200 a year, with larger packs working out cheaper.
Below, you can just about see the system cleaner ingredients. I would be very careful if you decide to use your own solution as the company says it can void the warranty.
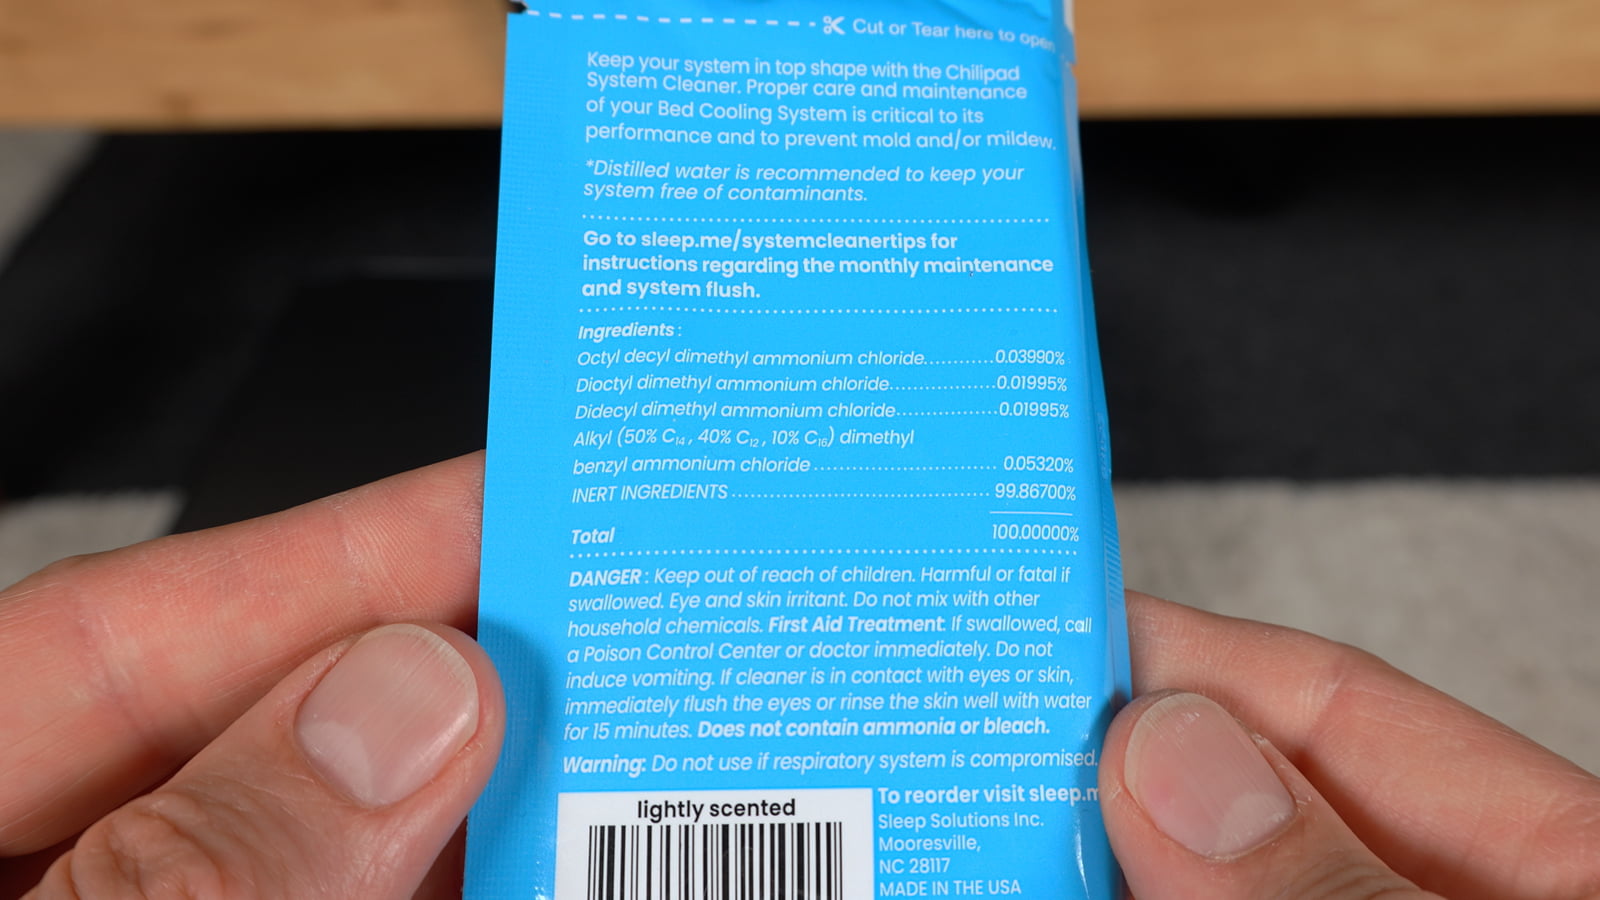
So no subscription doesn’t mean there are no ongoing costs. And I’d really like Sleepme to approve a cleaning solution you can buy elsewhere without risking the warranty. To me, that would make it even more appealing compared with brands that have pricey subscription fees just to access the features.
Note: I didn’t mention it in the video, but each dock came with 12 packs of the system cleaner, so the first year is covered.
Pros
Okay, let’s have a quick recap with the main pros and cons as I see them. Starting with the pros, the cooling and heating are both powerful. Dual zones give you separate temperatures on each side. There’s a simple app and convenient bedside remote control. There are subscription-free schedules that work offline. The mattress pad is comfortable and the cover is machine washable. And it has a modular design with replaceable parts.
Cons
As for the cons, the setup can be a bit fiddly at times. It needs regular maintenance and cleaning solution. Dual zones means four plugs for the two docks and two remotes. It’s expensive up front, especially dual zones. There’s no sleep or health tracking, and there is some fan noise.
Verdict & who might benefit most from using it
My verdict after four months is that the Chilipad 2 is a very effective bed cooling and heating system. And the new remote control in particular really sets it apart from other systems I’ve used.
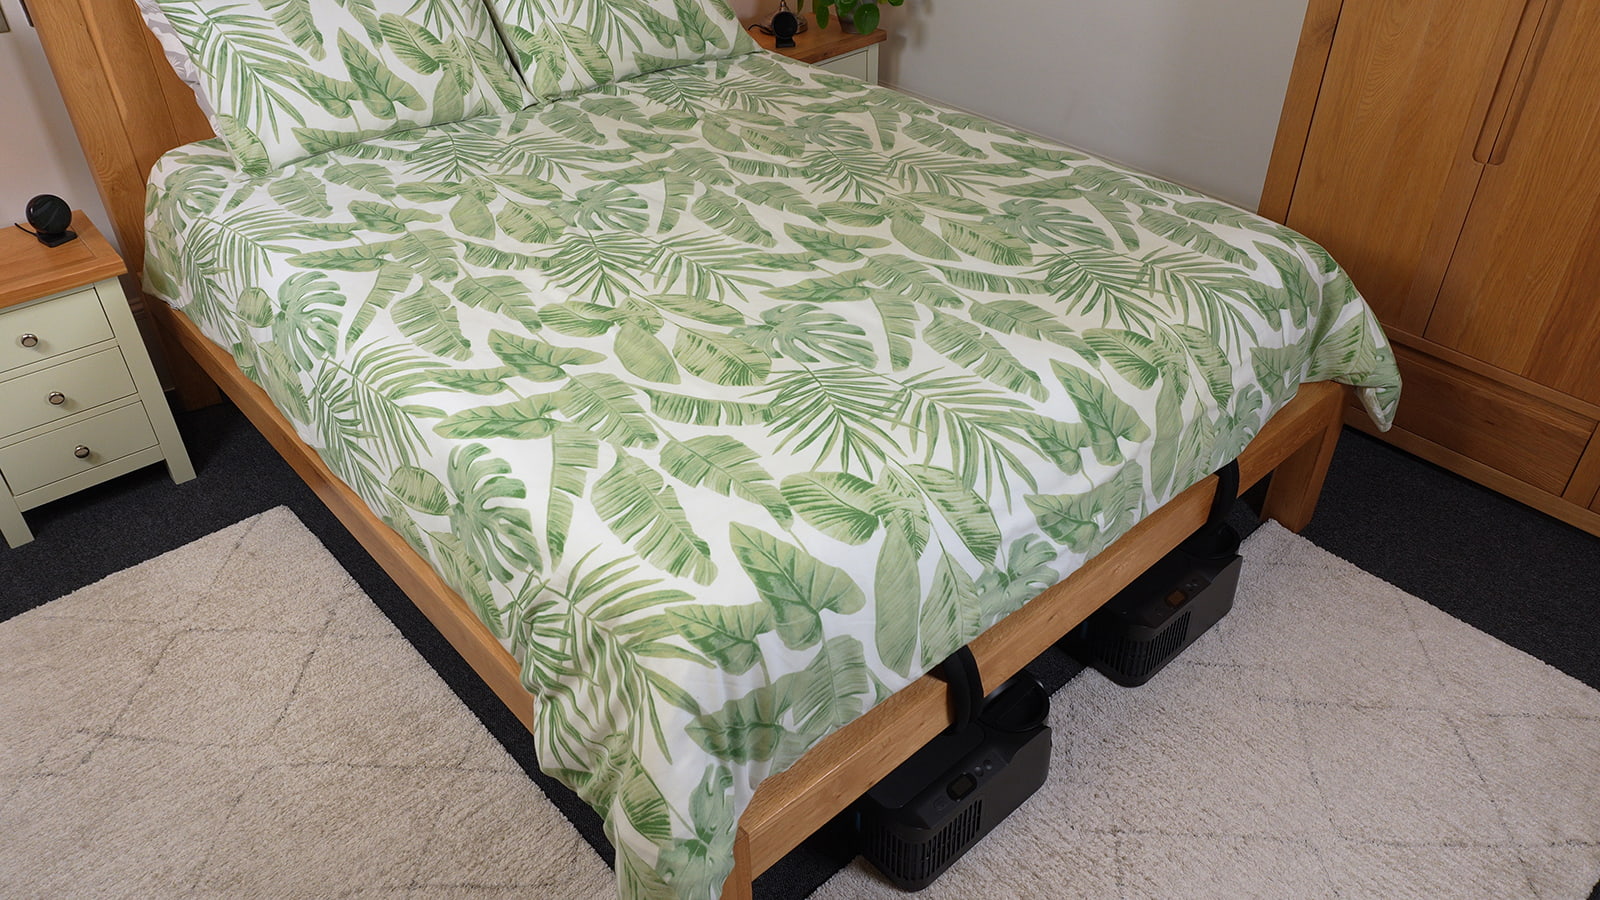
Most importantly, we both feel more comfortable when we have complete control over the temperature on our own side of the bed. I wasn’t lying awake at night during heat waves because the mattress felt too hot. And now the weather’s colder again, Irene doesn’t need an extra blanket and socks on top of our winter duvet.
Good for couples
Now, companies sometimes make very appealing claims about the potential benefits of their sleep products, such as increasing your REM or deep sleep, but points like that are very difficult for me to accurately verify.
And really, as time goes by and I spend more years using systems like this, my view is much more simply that a system like the Chilipad 2 is just really useful for couples with different temperature preferences.
You know, it’s just good not having to compromise so often on whether to open or close windows, or turn the air conditioning or heating on or off, or completely change the bedding. And points like that are much more important to us than chasing different sleep metrics.
Good for some individual sleepers
Having said that, if you sleep alone, the Chilipad 2 might also be a good choice if you always seem to be too hot or cold in bed or if your temperature needs change a lot in the night. For example, maybe you feel fine when you go to bed but wake up in the night feeling too hot or cold and you don’t want to keep changing the bedding or room temperature.
I also think it’s a good choice if you want temperature control without integrated sleep tracking and would like the option to run your schedules offline.
Who it might not be the right choice for
If you’re not the kind of person who’s happy to do regular maintenance or if you would like a system with sleep and health tracking, then it’s not going to be right for you.
If you don’t really struggle with temperature, then I wouldn’t FOMO into buying the Chilipad or any other expensive system either.
And if you already have the Chilipad 1 and it’s working well, I wouldn’t rush to upgrade unless the noise or comfort bothers you or you really want the remote.
If you have any questions, drop them in the comments below. I’m always happy to try and help. And if you haven’t already, it would be great if you could subscribe to my channel to keep in touch and see future reviews.
Thanks for reading and/or watching this one. Sleep well.
If you use the promo code nosleeplessnights, you can get an 8% discount on their official website with this link: